I have a few friends who are using the site GumRoad.com to sell their tutorials. Amazing friends who are 1000% more talented than I am. Since lulu was shut down and also subsequently Bytecommerce, I have been processing video sales by hand, and running emails back and forth to make sure everyone got their links in order. running data by hand is very discouraging and amidst the stress and jobs, it gets less motivating to complete the next big thing, but now, I can say that I have found what seems to be a reliable service that can distribute my messiah tutorials in a way that everyone is happy and promptly served, and I can focus on what I do best: making stuff.
please let me know if the links work proper (or if there are issues) either through email or setuptab.com.
LearnWings3d
Learn:Messiah Animation Tome
Learn:Messiah Rigging Tome
Here's to excellent creativity for years to come.
-JoeC
Thursday, August 28, 2014


Sunday, December 02, 2012
Rigging and Animation Tomes available!
good news! I've tested all of my old data in messiah V5 and compiled it into two tomes of knowlege
Rigging Tome
Animation Tome
Those of you wishing to pick up the rest of the series cheaply, use coupon code decgift in the discount field.
Now everyone should be up to speed when V6 comes out :)
Rigging Tome
Animation Tome
Those of you wishing to pick up the rest of the series cheaply, use coupon code decgift in the discount field.
Now everyone should be up to speed when V6 comes out :)
Saturday, December 17, 2011
recovering from lulu....
lulu.com has decided not to carry a certain product type anymore and focus on book and E-book publishing.
Let's just say that my entire video tutorial library was part of the 'certain product type' and now my links to lulu are empty. So I have set up a new account with www.bytecommerce.com and am serving them myself through another provider.
It has been 10 some-odd years since I had created a webpage... the last program I used was called Web Dwarf. I have given Google Sites a chance, and I really like the ease with which I can put up webspace. It's certainly not as easy as a blog, but Google products are integrated, and I can cross reference media and galleries.
So.. if you all want to take a look at the sparse offerings at www.joecosman.net, a short page will redirect you to my google site... where you will also be able to 'buy it now' on the tutorials that *were* on lulu. drop me a note if you have any questions or difficulties getting the videos.
Let's just say that my entire video tutorial library was part of the 'certain product type' and now my links to lulu are empty. So I have set up a new account with www.bytecommerce.com and am serving them myself through another provider.
It has been 10 some-odd years since I had created a webpage... the last program I used was called Web Dwarf. I have given Google Sites a chance, and I really like the ease with which I can put up webspace. It's certainly not as easy as a blog, but Google products are integrated, and I can cross reference media and galleries.
So.. if you all want to take a look at the sparse offerings at www.joecosman.net, a short page will redirect you to my google site... where you will also be able to 'buy it now' on the tutorials that *were* on lulu. drop me a note if you have any questions or difficulties getting the videos.
Tuesday, May 17, 2011
Ch6: Effects
a simple explanation of how to use and layer Messiah effects on an object for complex deforms.
Wednesday, March 23, 2011
Rigging 1 foot re-explanation
It's strange how things come back to haunt you, even if its not your fault. I have had my instructional videos out for 8 years now, and the only complaint I have gotten has been this tutorial video not yielding the same results for other people.
It turns out that some default settings had changed in messiah over the years, causing some headaches with my learning materials. But there isn't anything wrong with the project files or video at all. Here's why:
It turns out that some default settings had changed in messiah over the years, causing some headaches with my learning materials. But there isn't anything wrong with the project files or video at all. Here's why:
Monday, March 21, 2011
Messiah's metaEffectors
Way back in messiah:studio V2, I had decided to animate this skeleton model. This was my stress test for their new MetaEffector tool back when it was first introduced. MetaEffectors are weight fields that can be used to isolate different meshes, change how skeletons deform meshes, and even influence how shaders are blended, since it is a value-driven volume. while I may not be good at explaining *what* they do, I can show you this example. I used MetaEffectors to isolate and assign 160 bones in this skeleton model file to the animation controls within messiah. back then, it was no easy feat. this skeleton easily exceeded 100,000 polygons. so much that it had to be modeled into 5 parts in the beginning, and took up to 5 minutes to even open on my workstation.
Saturday, March 19, 2011
albertasaurus walk cycle
I found an older animation I had done with my skeleton of Albertasaurus libratus. rigged in messiah, connected to maya through Messiah's live connection and rendered out from there.
Thursday, March 17, 2011
Rigging1 and teaser for minituts1
I was digging through my archives when I saw my old portable hard drive. I had to load it up to see what was on it. Lo, I found the teaser vids that I had created to sell my first two instructional videos: Minituts1, and Rigging1. This was back before youtube, so they had to be small, and load fast off of my site.
Well, joecosman.com hasnt been up for quite a while, the times have slowly replaced it with automated entities such as blogger.com, youtube and vimeo and other various forms of online self-authoring. So.. here they are from the grave.
you can still purchase these videos still on www.lulu.com.
I am sure I have another teaser showing off minituts2 on another backup. I will keep finding those things and dust them off for you to see. In the meanwhile, here are some press images from animate2

the Noob teaches you about keyframes and animation concepts in Animate1


Rigging a full character with facial as well as a four legged character in Rigging2

just parts of a lesson on rigging in Minituts1. I really like the topology I made for it.

Tuesday, March 15, 2011
weekend sketches
My brother came over on the weekend, and we had some fun sketching and chatting. I was showing him the shading pens I had, and some of the charcoals. I dug up some old pastels I had inherited and played with those.
 it sure felt good to just goof off on paper for no reason at all. the face was drawn from memory, brown pastel/charcoal. smudged away with an old rag until I had my values set in.
 A good example of getting down to detail from wide strokes. It started out as a rag smudge and went from there. I was showing my brother when to stop adding and adjusting... which is when the idea finally shows itself. Messing with it more just leads to ruining the whole drawing, as I have clearly done here with the torso and backshading.. ahh well..


Monday, March 07, 2011
Saturday, March 05, 2011
2d Picture dump
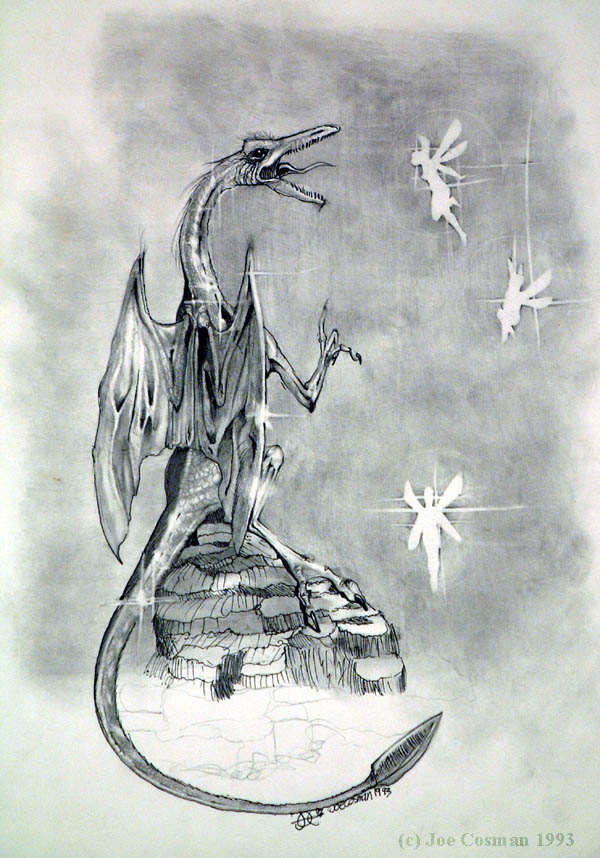
Its about time I started putting some older stuff up. alot of it is from my old website from years gone past, but some of these pics are just quick sketches during meetings, or traditional painting back in the day when I thought I had some real talent. Enjoy!




Tuesday, March 01, 2011
Ch4: items and heirarchies
Ch4: Items and Hierarchies
I upgraded to V5! so... now its time to continue explaining the Messiah interface and methods.
I dont know if I can be consistent about releasing these videos in a timely fashion, but at least they will be available for everyone to get a basic understanding of the program.
if you are having some issues with using the program, head over to http://www.setuptab.com and enter the chat. I am there sometimes, and I may be able to help you out. who knows, it may just wind up as a tip on youtube!....
Tuesday, February 22, 2011
traditional sculpting dump.
Here are a few pics of sculptures I did a while back. I am a big believer in traditional media. there is nothing like feeling, touching, and observing actual materials in an object. Engaging as many senses as you can, such as smell, feel, touch, will help you learn more about the object you are creating; It will solidify your understanding of shapes and flow. You will understand composition, and build out the habits of visualizing in 3 dimensions.

this macquette was commissioned for a private estate...

...which turned into this 30 foot monster.

my good friend Nathan Lindsay designed this fellow, which I turned into 3d.


Everyone wants to dream. I was steampunk before it was popular...


Real media lets you explore textures and understand them in a different way than digital can.


This sculpture was commissioned by the North American Museum Of Ancient Life.
It is the only life sculpture that the kids can play on, and was masterfully engineered to be bulletproof by my brothers, who are technical geniuses.

Monday, February 21, 2011
Dare to share. a PMG success...
Yes, I have not posted in a few years, and I need to get back in the swing. This is worth writing down:
PMG issued a challenge. In one week, how many people could pass along a message about an animation/rendering package called Messiah:Studio. Ten bucks a license was the reward if they could get enough people interested. Viral marketing in this day and age was a perfect fit for a challenge like that. Well... in one week, they got 100,000 views from over 114 countries, and countless numbers signed up for a license to "give it a try".
I am excited about this because I have been teaching this software for a decade to people who were willing to 'give it a try'. Hardly anyone knows of its existence, but it has flown under the radar doing its magic in studios and freelance jobs for decades. It is robust not because of the things it has done in the past, but because of what it can do now and tomorrow.
Seriously, the power of this program has not even been scratched. It has a full fledged nodal based shading system and renderer. You can even composite shaders on top of shaders for that Non-Photorealistic look, all linkable to cameras, lights, even bones, and weights.
it has C-language based scripting that can also program shaders, a realtime iconic interface system(armatures) that can control any aspect of your 3d scene, and even execute expressions.
It's got bone dynamics, cloth dynamics, sub surface scattering, network rendering, multithreaded, multicore rendering and interface acceleration. It can hook into Maya, Lightwave and MAX and 'puppeteer' your models live in their own native interface.
You can export models out to game engines, such as Unity3d, complete with animation and whatever else you need. Here is an example I made a while back in V4.5 straight export with some unity-programmed logic thrown in.
Now that PMG has the attention it asked for, it needs people to show off their software. We have all the tools we need to make what we want. We just need good artists to leverage them and push the software into the mindspace of the average user looking to tell their own 3d stories.
Everyone who has taken the leap of faith has not regretted it.
And yes, me and my friends can get you up to speed pretty fast with a tightly knit community with people who use the software daily.
Will you 'give it a try'?
Then head over to http://www. setuptab.com and see what the members are doing, as well as view and purchase instructional videos, models, and chat live with the users through IRC.
I also sell instructional videos from Lulu at http://stores.lulu.com/joecosman.
PMG issued a challenge. In one week, how many people could pass along a message about an animation/rendering package called Messiah:Studio. Ten bucks a license was the reward if they could get enough people interested. Viral marketing in this day and age was a perfect fit for a challenge like that. Well... in one week, they got 100,000 views from over 114 countries, and countless numbers signed up for a license to "give it a try".
I am excited about this because I have been teaching this software for a decade to people who were willing to 'give it a try'. Hardly anyone knows of its existence, but it has flown under the radar doing its magic in studios and freelance jobs for decades. It is robust not because of the things it has done in the past, but because of what it can do now and tomorrow.
Seriously, the power of this program has not even been scratched. It has a full fledged nodal based shading system and renderer. You can even composite shaders on top of shaders for that Non-Photorealistic look, all linkable to cameras, lights, even bones, and weights.
it has C-language based scripting that can also program shaders, a realtime iconic interface system(armatures) that can control any aspect of your 3d scene, and even execute expressions.
It's got bone dynamics, cloth dynamics, sub surface scattering, network rendering, multithreaded, multicore rendering and interface acceleration. It can hook into Maya, Lightwave and MAX and 'puppeteer' your models live in their own native interface.
You can export models out to game engines, such as Unity3d, complete with animation and whatever else you need. Here is an example I made a while back in V4.5 straight export with some unity-programmed logic thrown in.
Now that PMG has the attention it asked for, it needs people to show off their software. We have all the tools we need to make what we want. We just need good artists to leverage them and push the software into the mindspace of the average user looking to tell their own 3d stories.
Everyone who has taken the leap of faith has not regretted it.
And yes, me and my friends can get you up to speed pretty fast with a tightly knit community with people who use the software daily.
Will you 'give it a try'?
Then head over to http://www. setuptab.com and see what the members are doing, as well as view and purchase instructional videos, models, and chat live with the users through IRC.
I also sell instructional videos from Lulu at http://stores.lulu.
Thursday, September 25, 2008
Wings3d is an awesome modeler.

I took some time out from playing with messiah, and made a modeling video for an awesome freeware program called Wings3d. You can purchase it from Lulu here.

I've been using Wings since 2002, and it has been quite the workhorse, helping me complete small jobs, complex jobs(such as my messiah tutorials) and it has been used extensively on BVG games produced by Avalanche Software... at least the ones I worked on. Itellyouwhat, it has saved my butt many-a-time under deadline.
There are only two things I would wish for to make Wings complete:
morph targets, and vertex colors co-existing with UVs. It's clear that I could live without those, but hoo-boy, that would be very happy making for me.
The community behind wings is quite talented, so I'm sure those two features will eventually make it into the program. Heck, it isn't even to version 1.0 yet !!
Half of the modeling tutorials are timelapsed. The first 23 videos are meant to prime you on how to see what I'm doing, so that you can interpret the timelapses easily. This program is so easy to pick up, its like accellerated learning once you see a technique being shown at high speed.
even with half of it timelapsed, its still a couple hours long. Enjoy!
This is the [extensive] chapter list for this tutorial set:
Chapter List for Learn Wings3d
--
LearnWings3d_Ch01_Interface
A basic overview of the wings3d interface,and setting up the
workspace.
LearnWings3d_Ch02_Selections and Navigation
Setting up Wings navigation controls and how to move around
the scene and pick objects.
LearnWings3d_Ch03_MovingComponents
Learning how to use the menus and tweak mode to move
components.
LearnWings3d_Ch04_SubdivisionModeling
A breif introduction to subdivision modeling and it's
philosophy.
LearnWings3d_Ch05BasicSubDShapes
Learning how to handle and visualize subdivision meshes and
how to control subdivision curves.
LearnWings3d_Ch06MoreSubDShapes
Using and modifying a subdivision cage to demonstrate the
different sharp/round edges on complex corners.
LearnWings3d_Ch07EvenMoreSubDShapes
transitioning between sharp and smooth edges on a subdivision
mesh using Chapter 3's curve rules.
LearnWings3d_Ch08_ASimpleBody
Your first wings3d model, a simple human body.
LearnWings3d_Ch09_BodyTimelapse
Time-compressed video of the previous lesson, with more
shape refinements.
LearnWings3d_Ch10_EdgeLoops
Using the Edge loop philosophy to model and refine objects
easily.
LearnWings3d_Ch11_Hands
Approaching low-resolution hands using Edge loops.
LearnWings3d_Ch12_HandTimelapse
Time-Compressed video using the previous lesson for a more
refined hand.
LearnWings3d_Ch13Head
Construction of a base head mesh that is easy to alter and
refine.
LearnWings3d_Ch14_HeadTimelapse
Time Compressed video of a more refined head mesh.
LearnWings3d_Ch15_Feet
using simple geometry to generate complex Subdivision feet.
LearnWings3d_Ch16_FeetTimelapse
Time-Compressed Video of foot modeling using previous lesson's
techniques.
LearnWings3d_Ch17_EarTimelapse
Compressed video showing super simple ear geometry.
LearnWings3d_Ch18_ImagePlanes
how to use Wings3d's image plane to import reference
images to model.
LearnWings3d_Ch19_alienDogTimelapse
Time-compressed video Modeling a character from a sketch
imported as an image plane. (Note: previous version of Wings3d
is demonstrated)
LearnWings3d_Ch20_CavernFishTimelapse
Time-compressed video Modeling a character from a sketch
imported as an image plane. (Note: previous version of Wings3d
is demonstrated)
LearnWings3d_Ch21_UVs_And_Textures
Using wings3d's UV unwrap and UV Charts to unfold a 3d object
into 2d texturing space.
LearnWings3d_Ch22_UV_Projection
Use different methods of unfolding and projecting a complex
3d object into 2d UV space for textures.
LearnWings3d_Ch23_VertexColors
Use the vertex pallette to add color detail to an object
without texture maps or materials.
------------------------------
Chapter List for HiveAntTimelapse
--
LearnWings3d_HiveAntTimelapseA
Construction of the Body in mirror mode.
LearnWings3d_HiveAntTimelapseB
Construction of the legs and their assembly and posture.
LearnWings3d_HiveAntTimelapseC
Construction of Head, thorax and abdomen. Final assembly and
posing.
------------------------------
Chapter List for DinoTimeLapse
--
LearnWings3d_DinoCh1_Torso
Using Image Reference, construction of a torso through basic
shape refinement.
LearnWings3d_DinoCh2_Arm
"cube" modeling the arm, using techniques learned in previous
videos.
LearnWings3d_DinoCh3_Leg
"cube" modeling the leg, using landmarks on the reference
images, then refining the geometry.
LearnWings3d_DinoCh4_BodyMerge
Merging and bridging multiple meshes together to form one
unified mesh
LearnWings3d_DinoCh5_AnotherFoot
A different technique to constructing a leg from the foot up.
LearnWings3d_DinoCh6_Head
creation and refinement of the head geometry to mach reference
images.
LearnWings3d_DinoCh7_HeadMerge
Bridging the head mesh to the body mesh, cutting and tweaking
geometry to make a seamless transition.
LearnWings3d_DinoCh8_Optimize
re-routing edges, faces, and tweaking points to create an
optimal mesh that deforms easily, and is edited easily.
LearnWings3d_DinoCh9_UVs_A
(NOTE: this section is divided into subsections for easy study)
preparing the body for UV layout by marking hard edges in
modeling.
LearnWings3d_DinoCh9_UVs_B
Splitting the model with basic unwrapping, and unfolding the
toe meshes.
LearnWings3d_DinoCh9_UVs_C
Unwrapping and stitching the head sections together. Cutting
and stitching toes to the legs to form a single UV island.
LearnWings3d_DinoCh9_UVs_D
Freezing mirror to a full mesh and re-arranging the parts.
Arranging the claws in the UV window. Re-unfolding the head
And Body into unique UVs, instead of Mirrored UVs.
LearnWings3d_DinoCh9_UVs_E
Merging the Teeth and gums into the torso model, and
combatting the uv projection of each tooth. the teeth needed
more geometry added before UV mapping.
LearnWings3d_DinoCh9_UVs_F
Merging the eye geometry into the body to form a single model.
straight projection and rotating the eye UVs to line them up.
--------------------------
Chapter List for CrazyMechTimelapseVideo
--
LearnWings3d_CrazyMechA
Modeling the Right appendage. using Face operations to model
multiple details at once.
LearnWings3d_CrazyMechB
Modeling the torso, creating compound curves through simple
shapes, and refining them later.
LearnWings3d_CrazyMechC
lining up, scaling the torso to the right appendage.
LearnWings3d_CrazyMechD
"box" modeling simple objects that are duplicated and warped
into finger and hand mechanical parts.
LearnWings3d_CrazyMechE
Modeling the compound hand surface and joining fingers to it.
LearnWings3d_CrazyMechF
Creating the forearm, and insetting compound contours into the
basic shape of the arm.
LearnWings3d_CrazyMechG
generating the upper arm from parts of the lower arm to ensure
proper surface mating.
LearnWings3d_CrazyMechH
Creating the "nurnies" of the model. pistons and their
mounting points from one object to the next, using wings
vector operations to align them to their sockets.
LearnWings3d_CrazyMechI
Creating tubes through extrusion, beveling, and unique
"cube edge as path" extrusion.
LearnWings3d_CrazyMechJ
Right appendage connection points and "nurnies". Freezing and
finalizing torso mesh to be non-mirrored.
Tuesday, June 24, 2008
Thursday, March 20, 2008
ch2: loading files
ch2: loading and manipulating an object. Factoid: it takes me somewhere between 8 and 100 takes to record a segment straight through without stuttering.... much.
Monday, March 17, 2008
my intent here is to make some relatively simple videos that outline what it is to use messiah. no tricks, no uber-cool techniques, just plain 'ol pointing out and using features.
I think what throws people off is that there really isn't any good overviews of how to use and understand messiah, so we all get stuck trying to understand the interface, when we could be working on getting some awesome rigging and animations done.
I think what throws people off is that there really isn't any good overviews of how to use and understand messiah, so we all get stuck trying to understand the interface, when we could be working on getting some awesome rigging and animations done.
Thursday, February 28, 2008
Here is the chapter list for Facial Rigging 2
Chapter List for Advanced Facial Rigging 2
After Transform Morphs Ch1
Use Wings3d to prepare a face model for the lesson
After Transform Morphs Ch2
Use the Morph Blender Effect and Meta Effector weights to create a cluster for the Jaw
After Transform Morphs Ch3
Use the Morph Blender Effect and Meta Effector weights to create clusters for the Lips
After Transform Morphs Ch4
Use the Morph Blender Effect and Meta Effector weights to create clusters for the LipCorners
After Transform Morphs Ch5
Use the Morph Blender Effect and Meta Effector weights to create clusters for the Cheeks
After Transform Morphs Ch6
Use the Morph Blender Effect and Meta Effector weights to create clusters for the Eyelids
After Transform Morphs Ch7
Use the Morph Blender Effect and Meta Effector weights to create clusters for the EyeBrows
After Transform Morphs Ch8
Organize the Scene data for the next rigging step
After Transform Morphs Ch9
Create Poses in negative Keyframes for each part of the face
After Transform Morphs Ch10
Use the CBMAF expression in Command mode to link the poses to sliders.
After Transform Morphs Ch11
Place a skeleton in after the face rigging is complete.
Animate Morphs Ch1
Learn in Wings3d how to 'animate' a model through morph targets by modeling each state.
Animate Morphs Ch2
Create a sequencer in Messiah that will link each morph target in sequence.
Animate Morphs Ch3
Use the Sequencer to modify an Expression in Command mode to play the morph sequence on a slider.
Local Controllers Ch1
Prepare a character model in Wings3d for use in the lesson.
Local Controllers Ch2
Use MetaEffectors to separate portions of the Model for rigging.
Local Controllers Ch3
Create an animation skeleton that deforms the model.
Local Controllers Ch4
use MetaEffectors to weight lip edges for sneering.
Local Controllers Ch5
Create lip sneer controls outside the animation heirarchy.
Local Controllers Ch6
Use Null heirarchies to 'zero' out translation and rotation data on a controller.
Local Controllers Ch7
Use Messiah's CycleBranchMorphAddFrame expression to hook the local lip controls to the sneer controls.
Local Controllers Ch8
Add Teeth and tongue to the bone deformation effect. learn different ways of using metaEffectors to sort the weights out.
Local Controllers Ch9
set up a tongue control that moves a tongue skeleton outside the animation heirarchy.
Local Controllers Ch10
add eyes to the character with bones.
PuppetMaster Ch1
Prepare a model in Wings3d for the lesson. learn ways to slice up a face for the puppetmaster effect.
PuppetMaster Ch2
Test the different PuppetMaster Segments in Messiah using the Xform effect.
PuppetMaster Ch3
Use Wings3d to slice up a character into puppetMaster segments one polygon wide.
PuppetMaster Ch4
Learn to weight these segments correctly using only one model and the 'all connected' metaEffector.
PuppetMaster Ch5
Use Wings3d to slice up a higher resolution character, using mixed singe-poly and multi-poly wide segments
PuppetMaster Ch6
Construct a simple skeleton for the high resolution character.
PuppetMaster Ch7
Create Weights with MetaEffectors using the previous lesson's techniques.
use the MetaWeight tool to unify multiple metaEffectors into useable bone weights.
Chapter List for Advanced Facial Rigging 2
After Transform Morphs Ch1
Use Wings3d to prepare a face model for the lesson
After Transform Morphs Ch2
Use the Morph Blender Effect and Meta Effector weights to create a cluster for the Jaw
After Transform Morphs Ch3
Use the Morph Blender Effect and Meta Effector weights to create clusters for the Lips
After Transform Morphs Ch4
Use the Morph Blender Effect and Meta Effector weights to create clusters for the LipCorners
After Transform Morphs Ch5
Use the Morph Blender Effect and Meta Effector weights to create clusters for the Cheeks
After Transform Morphs Ch6
Use the Morph Blender Effect and Meta Effector weights to create clusters for the Eyelids
After Transform Morphs Ch7
Use the Morph Blender Effect and Meta Effector weights to create clusters for the EyeBrows
After Transform Morphs Ch8
Organize the Scene data for the next rigging step
After Transform Morphs Ch9
Create Poses in negative Keyframes for each part of the face
After Transform Morphs Ch10
Use the CBMAF expression in Command mode to link the poses to sliders.
After Transform Morphs Ch11
Place a skeleton in after the face rigging is complete.
Animate Morphs Ch1
Learn in Wings3d how to 'animate' a model through morph targets by modeling each state.
Animate Morphs Ch2
Create a sequencer in Messiah that will link each morph target in sequence.
Animate Morphs Ch3
Use the Sequencer to modify an Expression in Command mode to play the morph sequence on a slider.
Local Controllers Ch1
Prepare a character model in Wings3d for use in the lesson.
Local Controllers Ch2
Use MetaEffectors to separate portions of the Model for rigging.
Local Controllers Ch3
Create an animation skeleton that deforms the model.
Local Controllers Ch4
use MetaEffectors to weight lip edges for sneering.
Local Controllers Ch5
Create lip sneer controls outside the animation heirarchy.
Local Controllers Ch6
Use Null heirarchies to 'zero' out translation and rotation data on a controller.
Local Controllers Ch7
Use Messiah's CycleBranchMorphAddFrame expression to hook the local lip controls to the sneer controls.
Local Controllers Ch8
Add Teeth and tongue to the bone deformation effect. learn different ways of using metaEffectors to sort the weights out.
Local Controllers Ch9
set up a tongue control that moves a tongue skeleton outside the animation heirarchy.
Local Controllers Ch10
add eyes to the character with bones.
PuppetMaster Ch1
Prepare a model in Wings3d for the lesson. learn ways to slice up a face for the puppetmaster effect.
PuppetMaster Ch2
Test the different PuppetMaster Segments in Messiah using the Xform effect.
PuppetMaster Ch3
Use Wings3d to slice up a character into puppetMaster segments one polygon wide.
PuppetMaster Ch4
Learn to weight these segments correctly using only one model and the 'all connected' metaEffector.
PuppetMaster Ch5
Use Wings3d to slice up a higher resolution character, using mixed singe-poly and multi-poly wide segments
PuppetMaster Ch6
Construct a simple skeleton for the high resolution character.
PuppetMaster Ch7
Create Weights with MetaEffectors using the previous lesson's techniques.
use the MetaWeight tool to unify multiple metaEffectors into useable bone weights.
Advanced Facial Rigging 1
Here is the Chapter List for Advanced Facial Rigging 1:
---
Part1_Silver
---
Silver_Ch1_Intro
-Basic explanation of how this character's features are built
for the tutorial.
Silver_Ch2_Lips
-use Messiah's flex deformer to control the lips, using MetaEffectors
to mask the weighting.
Silver_Ch3_Jaw
-use messiah's Xform effect and the Metaweight Compositing tool
for dynamic lip weighting.
Silver_Ch4_Cheek
-Use Messiah's Flex deformer to control Sneers and cheek movement.
Silver_Ch5_Brow
-Use Messiah's Flex deformer to control Brow movement
silver_Ch6_Skeleton
-Add a generic skeleton to Silver.
silver_Ch7_Eyes
-add skeleton to the eye geometry.
silver_Ch8_Organize
-use Nulls in a scene to organize Silver's effects and controls.
silver_Ch9_Sliders
-learn how prototyping mouth behaviours can lead to better control.
silver_Ch10_poses_Mouth
-using the prototyped sliders from the previous lesson, create
accurate facial poses for the Mouth.
silver_Ch11_Poses_Brow
-using prototyped sliders, create facial poses for the brow.
silver_Ch12_Poses_Face
-using prototyped sliders, create facial poses for the cheeks and eyes.
silver_Ch13_CBMAF_Mouth
-use expressions to link the mouth poses to the sliders.
silver_Ch14_CBMAF_Face
-Use expressions to link the brow and cheek poses to the sliders.
silver_Ch15_CBMAF_Eyes
-use Expressions to link the Eyes and Eyelid poses to the sliders
Silver_MetaWrinkles_CH1_intro
-this is an overview to wrinkle morph targets.
Silver_MetaWrinkles_CH2_SilverForehead
-use Wings3d to model wrinkles into Silver's forehead.
Silver_MetaWrinkles_CH3_SilverMouth
-Use Wings3d to model Wrinkles into Silvers Mouth, nose, and Cheeks
Silver_MetaWrinkles_CH4_WrinkleMorphs
-hook up the wrinkle morphs to Silver inside Messiah.
Silver_MetaWrinkles_CH5_WrinkleForehead
-Explanations and methods of making dynamic Wrinkle morphs for Silver's
forehead.
Silver_MetaWrinkles_CH6_WrinkleMouth
-Explanations and methods of making dynamic Wrinkle morphs for Silver's
mouth, cheeks and nose.
---
Part 2_Jim
Note: the Wings3d segment of this part have been reduced to 640 by 360 to fit
on this CD. all other videos on this CD are 960 by 530.
---
DeltaMorphs_Ch1_Morphs
-Create a blink morph to discuss the shortcomings of morph targets.
DeltaMorphs_Ch2_Corrective
-simple theory of creating a corrective target to overcome the linear movement.
DeltaMorphs_Ch3_SineTheory
-use expressions to define how the corrective morph applies to the blink to fix it.
Jim_Ch1_OpenMorph
-use Wings3d to model Jim's Jaw open.
Jim_Ch2_StickMorph
-use messiah as a modeling tool to generate a reverse-morph to close Jim's
lips when his mouth opens.
Jim_Ch3_SneerMorph
--use Wings3d to model Jim's lip Sneer.
Jim_Ch4_CurlMorph
-use Wings3d to model Jim's Lip Curling.
Jim_Ch5_PullMorph
-use Wings3d to model Jim's corner lip pull.
Jim_Ch6_WidthMorph
-use Wings3d to model Jim's Lip narrowing morph.
Jim_Ch7_PuffMorph
-use Wings3d to model Jim's cheek puffing.
Jim_Ch8_SmileMorph
-use Wings3d to model Jim's Smile morph.
Jim_Ch9_BlinkMorph
-use Wings3d to model Jim's Blinking lids.
Jim_Ch10_LipMorphs
-use Wings3d to model Jim's Lip translations.
Jim_Ch11_GrindMorph
-use Wings3d to model Jim's Jaw grinding.
Jim_Ch12_GrindStickMorph
-Use Messiah as a modeling tool to reverse-morph a closed-mouth grind shape.
Jim_Ch13_SquintMorph
-use Wings3d to model Jim's Cheek Squinting.
Jim_Ch14_BrowMorph
-use Wings3d to model Jim's brow positions.
Jim_Ch15_SetupSkeleton
-drop a skeletal effect into jim for his neck, head, and eye control.
use Nulls to zero-out translation and rotation values on facial controls.
Jim_Ch16_Jawcontrol
-use expressions to tie the morph targets to Jim's Jaw Control bone.
Jim_Ch17_JawControlMeta
-Use metaEffectors driven by expressions to control left and right
blending on Jim's Mouth.
Jim_Ch18_LipControl
-Use Expressions to tie morph targets to Jim's Lip Control bone.
Jim_Ch19_LipControlMeta
-Use MetaEffectors to control left and right blending on Jim's lips.
Jim_Ch20_CheekControl
-Use expressions to tie morphs to Jim's Cheek Control Bone.
Jim_Ch21_BrowControl
-Use Expressions to tie morphs to Jim's Brow. control all of the
brow positions with one bone.
Jim_Ch22_EyeLidControl
-layer expressions onto each other to get sticking eyelids and, eyelids_Ch23_Eyes
use expressions to tie the eyes and eyelids to the same control bone.
---
Part1_Silver
---
Silver_Ch1_Intro
-Basic explanation of how this character's features are built
for the tutorial.
Silver_Ch2_Lips
-use Messiah's flex deformer to control the lips, using MetaEffectors
to mask the weighting.
Silver_Ch3_Jaw
-use messiah's Xform effect and the Metaweight Compositing tool
for dynamic lip weighting.
Silver_Ch4_Cheek
-Use Messiah's Flex deformer to control Sneers and cheek movement.
Silver_Ch5_Brow
-Use Messiah's Flex deformer to control Brow movement
silver_Ch6_Skeleton
-Add a generic skeleton to Silver.
silver_Ch7_Eyes
-add skeleton to the eye geometry.
silver_Ch8_Organize
-use Nulls in a scene to organize Silver's effects and controls.
silver_Ch9_Sliders
-learn how prototyping mouth behaviours can lead to better control.
silver_Ch10_poses_Mouth
-using the prototyped sliders from the previous lesson, create
accurate facial poses for the Mouth.
silver_Ch11_Poses_Brow
-using prototyped sliders, create facial poses for the brow.
silver_Ch12_Poses_Face
-using prototyped sliders, create facial poses for the cheeks and eyes.
silver_Ch13_CBMAF_Mouth
-use expressions to link the mouth poses to the sliders.
silver_Ch14_CBMAF_Face
-Use expressions to link the brow and cheek poses to the sliders.
silver_Ch15_CBMAF_Eyes
-use Expressions to link the Eyes and Eyelid poses to the sliders
Silver_MetaWrinkles_CH1_intro
-this is an overview to wrinkle morph targets.
Silver_MetaWrinkles_CH2_SilverForehead
-use Wings3d to model wrinkles into Silver's forehead.
Silver_MetaWrinkles_CH3_SilverMouth
-Use Wings3d to model Wrinkles into Silvers Mouth, nose, and Cheeks
Silver_MetaWrinkles_CH4_WrinkleMorphs
-hook up the wrinkle morphs to Silver inside Messiah.
Silver_MetaWrinkles_CH5_WrinkleForehead
-Explanations and methods of making dynamic Wrinkle morphs for Silver's
forehead.
Silver_MetaWrinkles_CH6_WrinkleMouth
-Explanations and methods of making dynamic Wrinkle morphs for Silver's
mouth, cheeks and nose.
---
Part 2_Jim
Note: the Wings3d segment of this part have been reduced to 640 by 360 to fit
on this CD. all other videos on this CD are 960 by 530.
---
DeltaMorphs_Ch1_Morphs
-Create a blink morph to discuss the shortcomings of morph targets.
DeltaMorphs_Ch2_Corrective
-simple theory of creating a corrective target to overcome the linear movement.
DeltaMorphs_Ch3_SineTheory
-use expressions to define how the corrective morph applies to the blink to fix it.
Jim_Ch1_OpenMorph
-use Wings3d to model Jim's Jaw open.
Jim_Ch2_StickMorph
-use messiah as a modeling tool to generate a reverse-morph to close Jim's
lips when his mouth opens.
Jim_Ch3_SneerMorph
--use Wings3d to model Jim's lip Sneer.
Jim_Ch4_CurlMorph
-use Wings3d to model Jim's Lip Curling.
Jim_Ch5_PullMorph
-use Wings3d to model Jim's corner lip pull.
Jim_Ch6_WidthMorph
-use Wings3d to model Jim's Lip narrowing morph.
Jim_Ch7_PuffMorph
-use Wings3d to model Jim's cheek puffing.
Jim_Ch8_SmileMorph
-use Wings3d to model Jim's Smile morph.
Jim_Ch9_BlinkMorph
-use Wings3d to model Jim's Blinking lids.
Jim_Ch10_LipMorphs
-use Wings3d to model Jim's Lip translations.
Jim_Ch11_GrindMorph
-use Wings3d to model Jim's Jaw grinding.
Jim_Ch12_GrindStickMorph
-Use Messiah as a modeling tool to reverse-morph a closed-mouth grind shape.
Jim_Ch13_SquintMorph
-use Wings3d to model Jim's Cheek Squinting.
Jim_Ch14_BrowMorph
-use Wings3d to model Jim's brow positions.
Jim_Ch15_SetupSkeleton
-drop a skeletal effect into jim for his neck, head, and eye control.
use Nulls to zero-out translation and rotation values on facial controls.
Jim_Ch16_Jawcontrol
-use expressions to tie the morph targets to Jim's Jaw Control bone.
Jim_Ch17_JawControlMeta
-Use metaEffectors driven by expressions to control left and right
blending on Jim's Mouth.
Jim_Ch18_LipControl
-Use Expressions to tie morph targets to Jim's Lip Control bone.
Jim_Ch19_LipControlMeta
-Use MetaEffectors to control left and right blending on Jim's lips.
Jim_Ch20_CheekControl
-Use expressions to tie morphs to Jim's Cheek Control Bone.
Jim_Ch21_BrowControl
-Use Expressions to tie morphs to Jim's Brow. control all of the
brow positions with one bone.
Jim_Ch22_EyeLidControl
-layer expressions onto each other to get sticking eyelids and, eyelids_Ch23_Eyes
use expressions to tie the eyes and eyelids to the same control bone.
Subscribe to:
Posts (Atom)